Forage and garden: bitter-sweet and homemade amaro

1500757_10202719089236861_130854274_oHaving spent a full day indoors at the computer, the time has come to mix a cocktail (a rye Manhattan with both sweet and dry vermouth and a splash of Cocchi Vermouth di Torino) and walk in the remaining warmth of a perfect fall evening, in search of bittering agents I could dig up.

In pursuit of bitters I am definitely behind the curve, having just decided I could make my own amaro. But without access to the bittering agents that would really deepen the recipe to a complex, intense blend (gentian is first on that list), I’ve stalled.  We are past the time to harvest hops; I can’t yet identify wild gentian. So I stepped slowly, scanning for dandelion (harboring a new regret that I tend to dig them out), or broadleaf plaintain, or burdock, and for other roots I can’t name but will spend the evening trying to identify.

Bitters. You might think of those small bottles, wrapped in kraft paper and frequently available in supermarkets and specialty stores, by the names Underberg, Angostura, Fee Brothers or Peychaud’s; these are cocktail bitters. The recipes generally call for a couple drops also known as a dash. You’d never want to drink these neat.

But I’m picturing tall bottles of amaro (Italian for bitters, though variations on the idea are found just about everywhere) – an alcoholic preparation flavored with botanicals, often intensely bitter. The list of amaro includes names like Campari, Averna, Cynar, Aperol, Fernet Branca, Ramazzotti, Jagermeister, Becherovka, Antica Formula, and their less bitter cousins, Italian vermouths like Cocchi Vermouth di Torrino or Carpana Antica. Some of the more commonly used amaro included flavors from cascarillacassiagentianorange peel, and cinchona bark.

Generally low in alcohol, they can be enjoyed straight up, on the rocks, with a splash of soda or mixed into a cocktail. The older traditional usage was medicinal (think of those depictions of the medicine shows from the 19th century with their magical medical elixirs), and you can imagine it – deeply bitter, nearly distasteful (even repulsive to some), a spoonful intended to cure what ails you.

Autumn Amaro

Autumn Amaro

My first attempt at amaro is brewing in the cellar; a vodka base with foraged wild or organic flavors: whole Asian quince, wild apple, pear and rosehips, tarragon, parsley, lemon verbena, allspice, peppercorns, arugula leaf, thyme, rhubarb, coriander, anise and fennel seeds, raspberries, and dandelion root. It’s been steeping for a month, but still needs that extra bitter ingredient to get to the flavor I’m hoping for.

Recipe

My favorite way to drink amaro – besides a shot in soda water on the rocks – is my own version of a Manhattan, I call it the Bitter Ex-New Yorker: 2 parts rye, 1 part each sweet and dry vermouth, 1/2 part amaro, and a dash of Hella’s aromatic bitters would be most appropriate. Garnish with a twist of orange.


For more on making your own amaro check out the Serious Eats post on the subject:  http://www.seriouseats.com/recipes/2012/05/diy-amaro-homemade-amari-averna-recipe.html

Posted in Adventures in cooking, Drinks, Fermenting, Liqueurs and elixirs, Process, Wild | Tagged , , , , , , , , , | Comments Off on Forage and garden: bitter-sweet and homemade amaro

Baking wheat-free: grind your own grains

The web is full of gluten-free posts, but for many of us it isn’t the gluten but some other aspect of wheat (and I’m researching this to post later) that cause our problems. For me it isn’t celiac or digestive discomforts that result from eating flour products but a facial rash.  I’ll see the reaction within 24 hours, and it takes days to clear up. But it’s hard to live without wheat when one travels, or dines in restaurants or in people’s homes. The one place I can control it is in my own kitchen. In recent years there are many ready-made products, grains and recipes to help support my desire for baked goods without wheat. But my goal is to convert as many favorites treats as possible to wheat free options.

Varco Inc grinder

Varco Inc grinder

The number one tool I’ve found to improve my flour options is a small appliance: a hand-held coffee grinder, dedicated to flours only. I bought my Varco grinder 25 years ago (for under $10; a little Krups grinder retails today for $20) for spices and it’s still running fine. Now I use it mostly for grinding grains. But you do need to have a dedicated grinder – don’t use the same one for grains and coffee.

Still, there are many acceptable commercial flour blends available, and far more recipes for blending your own GF-AP flour combinations. While you can’t hope to fully replace wheat flours with their predictable gluten levels (consider how difficult it is to find decent GF bread), you can make many wonderful baked goods with a wheat free blend of your own.

 Some commercial blends

  • Bob’s Red Mill GF flour: potatoes, sorghum, tapioca, garbanzo and fava beans.
  • Namaste GF AP flour: Sweet brown rice flour, tapioca flour, arrowroot flour, sorghum flour and xanthan gum.
  • King Arthur GF blend: white rice and whole-grain (brown) rice flours, tapioca starch, and potato starch.

As you can see from their ingredient lists, the nutritional content in these flours is pretty low. You can make your own blends, or just supplement the purchased AP blend by adding your own freshly ground grains. But it’s important to use a blend – each grain/starch provides an important element to creating structure in your baked goods.

 Non-Wheat Grains for Flours

You can also buy many other grains to blend, both whole and already ground. I prefer to buy organic (by USDA definition these should be non-GMO as well, but there’s no guarantee). The most available and useful gluten-free flours for wheat free baking include:

 Whole Grain Flours

Brown Rice Flour
Buckwheat Flour
Corn Flour
Millet Flour
Oat (Oatmeal) Flour
Quinoa Flour
Sorghum Flour

Faro flour
Teff Flour

White Flours/Starches

Arrowroot Flour
Cornstarch
Potato Flour
Potato Starch
Sweet Rice Flour
Tapioca Flour
White Rice Flour

Nut Flours (many nuts can be ground to flour but these are the easiest to use)

Almond Flour

Chestnut Flour

Coconut Flour

Hazelnut Flour

Bean Flours

Lentil Flour

fava bean flour
garbanzo bean flour
soybean flour

Consider whether any of these cause you other reactions – especially soy and beans.

Make your own

Plan to play with the blends a little. Try adding one cup of your own ground whole grain to a blend. Cooks Illustrated has a recipe similar to the commercial brands:

http://www.cooksillustrated.com/recipes/7854-americas-test-kitchen-gluten-free-flour-blend

Another recipe has xanthan built in http://www.yourhomebasedmom.com/gluten-free-flour-mix/

 A couple tips:

Buy some xanthan gum – you need a little bit in any recipe where gluten is really necessary.

Make sure you sift your ground flours together. You can regrind larger particles of millet, quinoa or nuts to minimize waste.

When grinding nuts – as they get finer they release oils that can quickly become paste (or nut butter). To prevent this, you can add a couple tablespoons of sugar (when appropriate) or a few tablespoons of flour. And be careful not to over grind.

Coconut flour absorbs more moisture, so plan to add an extra tablespoon or two of liquid or butter. You have to experiment.

So what do you have in your pantry right now?

Posted in Adventures in cooking, Breads and crackers, Gluten Free, Grains | Tagged , , , , | Comments Off on Baking wheat-free: grind your own grains

Saffron Coconut Sablés

a double batch of sablés

a double batch of sablés

Saffron Coconut Sablés (butter cookies) encrusted with nuts

This year’s new Christmas cookie is another one for the more sophisticated palette, as addictive as your favorite homey cookies of yore but also perfect to serve at the end of an elegant holiday feast.

Sablés are incredibly simple – they are old-fashioned icebox cookies, mixed ahead, rolled into logs and chilled for a day or more before baking. They freeze well so you can make a big batch in November to bake in December.

I first saw the basic recipe for this cookie (and the other two aforementioned favorites), based on one from Pierre Hermé (the Parisian Pastry chef, famed for his unusually flavored macaroons, among other marvels of patisserie), when baker/artist/friend Peggy Cullen was adapting some of his recipes for Food & Wine Magazine.  Inspired by Hermé’s inventive approach to layering flavors, I’ve added saffron and coconut, a little more flour, and a little less sugar, so the scent of saffron pops. The pistachios enhance the crunch and depth. (I ran out of pistachios part way through my baking so I toasted almond slivers, as well as the local hickory nuts I collected this fall– now I have three variations – each subtly different.) The seminal inspiration came from the first bite of an Indian-style rice pudding at a small restaurant in Saratoga using all the same flavorings.

Sablé (prounced sɑbl) means sandy, and this delicious, intriguingly delicate cookie is tender, sugary, a little salty, crumbling on your tongue, lingering and dissipating, until you bite into the next.

This is recipe is well suited to a gluten free flour blend. Store bought gluten-free flours make life easier and better for the wheat-free eater, however, I prefer my own blend, it’s heartier, with more whole grain flour, and loaded with nutrition. Using a small coffee grinder dedicated to spices and grains, I grind measures of organic rolled oats and brown rice, with quinoa and toasted millet, then lightening it a bit with a scoop of corn starch and tapioca.

Sablés are meant to be basic sugar cookies – and thus lend themselves to nuances and subtleties. Yet, even without saffron or coconut, sablés are a luscious, delicate, buttery cookie.  To modify for the simplest variation, just leave out the saffron and add a ½ t of pure almond or vanilla extract.

Here’s my selection for 2013’s Christmas cookie. Sweet and rich, and addictive.

Saffron Coconut Sablés

This recipe doubles well.

Yield depends on the size of your cutter. Using a 2” round this recipe yielded about 13 dozen.

1 1/2 cups all-purpose flour (you may substitute ½ c flour for ½ finely ground unsweetened coconut, or coconut flour)

1/2-teaspoon baking soda

1/2-teaspoon fine sea salt

1/4-teaspoon saffron

1/2-teaspoon vanilla extract

1 stick plus 3 tablespoons unsalted butter, softened

1/2-cup sugar

1/4 c fine ground pistachios (toasted almonds work well)

Working ahead:

30 minutes ahead: Start with 1T water in a small pot (or bowl for microwave), add a pinch of saffron (up to 1/4t), heat to boiling, being careful not to boil all the water out, reducing water to 1t. Add 1 stick (8T) butter to the pot, melting it completely over medium heat then allow to cool until solid (place in fridge or freezer for 15- 30 minutes). This deeply infuses the saffron flavor into the butter.

Preheat the oven to 325°.

In a small bowl, whisk the flour (combined with the optional finely ground coconut) with the baking soda and salt.

Beat the chilled saffron butter with the additional 3 T butter until creamy. Then beat in the sugar until light and fluffy. Next mix in the flour blend. It will form a slightly moist dough, coming together on the beaters. Scoop the dough onto a floored surface in order to form a 6-inch disk. Wrap in plastic and refrigerate until well chilled, at least 1 hour.

On a lightly floured work surface, roll out the dough quite thin, about 3/8” thick. Before the last roll sprinkle on the nuts and pass the rolling pin over once to set the nuts into the surface. Using a floured cookie cutter (your choice of size. The rounds in the photo are no more than 2” in diameter), stamp out all the cookies you can. Carefully transfer cookies to parchment* paper-lined baking sheets, allowing about 1 inch of space between, though these should not spread very much. You can chill the scraps or just proceed to reroll the scraps and stamp out more cookies (it’s okay that now you are rolling the nuts right into the dough now). Bake the cookies 1 sheet at a time** until lightly browned around the edges, about 14 minutes. Let cool slightly, transfer to a rack to cool completely.

Store in an airtight container. These cookies are likely to pick up other flavors so avoid storing them with pother cookies. Can be frozen, can be doubled well.

*I find parchment yields a golden crisp cookie, while silpat liners keep the cookies a very pale color. While this latter attribute can be useful for some recipes, for this cookie, you want them to turn a little brown.

** If you use a convection oven or carefully watch over your trays, you can bake two (or more) cookies trays at a time. Just switch their positions at the halfway point, making sure to turn the tray 180 degrees as well.


Posted in Cookies, Gluten Free, Uncategorized, Wild | Tagged , , , , | 2 Comments

Stonefruit Almond Cake

photo

Plums, peaches, nectarines, cherries, and berries. With frequent visitor both planned and spontaneous, plus picnics and BBQs with friends, seasonal desserts  featuring fresh local fruit are a great treat – just add ice cream. And as evenings are getting cooler we crave a little warm dessert around 9 pm. This one is a buttery, dense almond cake with meltingly, sweet-tart nectarines to satisfy our sweet tooth. And these very cool mornings, we smile again, digging into a slice of cake with a cup of coffee to start the day.

The basic dough with almond flour is perfect for a dessert made with most stone fruit – black plums, peaches, nectarines work well, as do sour cherries. I reduce the sugar by 2 T when making this cake with peaches or nectarines. Cherries and berries will work but of course, without the sunburst effect on top.

The recipe translates well to a gluten free flour blend, but when using non-gluten flours it is best eaten the day its made.

Ingredients

  • 1 cups all purpose flour or gluten free blend (if using gluten free also blend add 1t xanthan gum)
  • ¼ c finely ground almonds or commercial almond flour (if not available use an additional ¼ c flour)
  • 1 teaspoon baking powder
  • 1/4 teaspoon salt
  • 1/4 teaspoon ground cinnamon
  • 1/2 cup (1 stick) unsalted butter, room temperature
  • 2/3 cup sugar
  • 2 large eggs
  • 1 tablespoon fresh lemon juice*
  • 1 teaspoon lemon zest
  • About 5 large plums (1 1/4 pounds), pitted, cut into 1/2-inch wedges or 3 large nectarines.
  • Optional: 1 tablespoon sugar for sprinkling

Preheat oven to 350°F.

Butter a 9-inch-diameter spring form pan. (If you don’t have a spring form pan a 9” cake pan can be used. Butter the pan, line with a parchment circle, butter and flour. When unmolding the cake, place a dinner plate over the top in order to flip the cake out of the pan, remove the parchment liner and flip back onto your serving plate.)

Whisk flours, baking powder, cinnamon and salt in small bowl. In a separate bowl beat butter until fluffy. Add 2/3-cup sugar and beat again until light. Add eggs one at a time, and then add lemon juice and lemon zest (or vanilla or other flavoring), beating after each addition until blended. If you skip the lemon juice for another flavor, make sure you have enough moisture added. You may need to add 1T of room temperature water. Beat in the flour mixture, just until smooth. The batter will be dense. Spread into prepared pan.

Press wedges of fruit, skin up, halfway into the batter in a concentric circle (see the photo), starting from outside, spacing the fruit slightly apart so that there is dough between. Place one to three slices in the middle, depending on how much room you have. Optional: sprinkle 1T of sugar over the top.

Bake in the center of the oven at 350 for about 50 minutes, until cake is golden brown and tester comes out clean. Slide a knife around the outer edge of the cake to release pan sides. Serve cake warm or at room temperature.

Doubles well for a sheet pan. Perfect on its own – warm or room temperature, with sweetened whipped heavy cream or with a scoop of vanilla ice cream.

Posted in Cakes, Desserts and other sweets, Gluten Free | Tagged , , , | Comments Off on Stonefruit Almond Cake

Oatmeal Brulée

Oatmeal Brulee

Oatmeal brulée is today’s breakfast. Nowhere as sweet as the classic crème brulée dessert, it’s festively suitable for a party of 6 people or a crowd for brunch, or when you are serving a special breakfast in bed to your sweetheart.

Steel cut oatmeal is my number one breakfast. My version (which I’ve posted before, see Snowy day, hot breakfast) usually includes a small portion of quinoa for texture and protein.  Most mornings I use no more than 1/2t (at most) of maple syrup drizzled on top, garnished with a couple of crushed pecans.

Making a brulée requires enough sugar on top to melt and pool, then cool into a crusty top. You will get a better crust, more like the familiar dessert, crème bruleé, if you use 1 t of sugar per ramekin. Cutting back will still give you a slight sweet crunch. You can skip the maple syrup to reduce the sweetness a little. But I like the stickiness and essence of maple that even a mere drizzle can provide, so I use less sugar.

All the steps can be prepared a day or two ahead, so in the morning breakfast is quick.  Add the sugar just before broiling. You want crystals, not dissolved sugar.

with sautéd pears

with sautéed pears

Serve with a bright fresh fruit salad with creamy textures like mango, raspberries, banana, avocado and more slivered pears

One point to make about equipment is that 6 oz. ramekins will hold about 1/3 c serving in total. It’s a size I like for desserts, and works well for a lighter breakfast. If you have a hungrier crowd, go with 8 oz. ramekins (you can get a set of 12 for as little as $35. Or watch for them at yard sales and thrift stores).

Use any recipe you like for the steel cut oatmeal.

Time involved:

Dice and sauté pears: 30 minutes

Cook oatmeal: 45 minutes (or use the overnight method)

Set up and broil:  15 minutes

Yields 6 – 6oz ramekins

Ingredients

1.5 c cooked oatmeal

2 ripe pears

¼ t high quality cinnamon

1 T butter

2 t maple syrup

4 – 6 t sugar

drizzled with maple

drizzled with maple

 Directions

Peel, core and coarsely dice pears.  Melt 1 T of butter in a skillet, add pears and sauté on medium-low until the turn slightly translucent and are tender, about 15 minutes, sprinkle with cinnamon. They should retain their shape, not becoming too soft. Set aside (These may be prepped several days ahead and kept in the fridge in a covered container. Warm before serving)

Set ramekins on a cookie sheet.

Have ingredients heated and waiting. Heat the broiler (about 450 f) and set oven rack in top position as you prepare the individual servings.

Add about 1 T of diced sautéed pears to bottom of each ramekin. Top with hot cooked oatmeal (about ¼ c). Smooth the surface with the back of a spoon, you don’t wan hills and valleys so you get an even crust with no charred points. Evenly distribute drizzled maple syrup and sprinkle with sugar.

With a damp cloth wipe the edges of your ramekins (this is a purely aesthetic step – any sugar or oatmeal on the edge will burn). If you are skilled with a kitchen torch you can use that instead of broiling.

Place tray with ramekins in oven, under broiler. Broil for 3 minutes, check to see if you have caramelization yet, return to oven for another minute and check again. You may need 5 minutes total to melt all the sugar; it should be bubbling and golden but not burned. Want to test t make sure it’s crisp? Do not touch the surface with a bare finger – lightly tap it with the back of spoon.

Remove from oven; carefully transfer very hot ramekins to serving plates. Serve while hot.

Recipe can be doubled or tripled. Can be made ahead and put together when ready to serve, or frozen in ramekins, without the sugar topping. Defrost and bring to room temperature before broiling.

Posted in Breakfast, Gluten Free | Tagged | 1 Comment

Homemade food gifts for Christmas

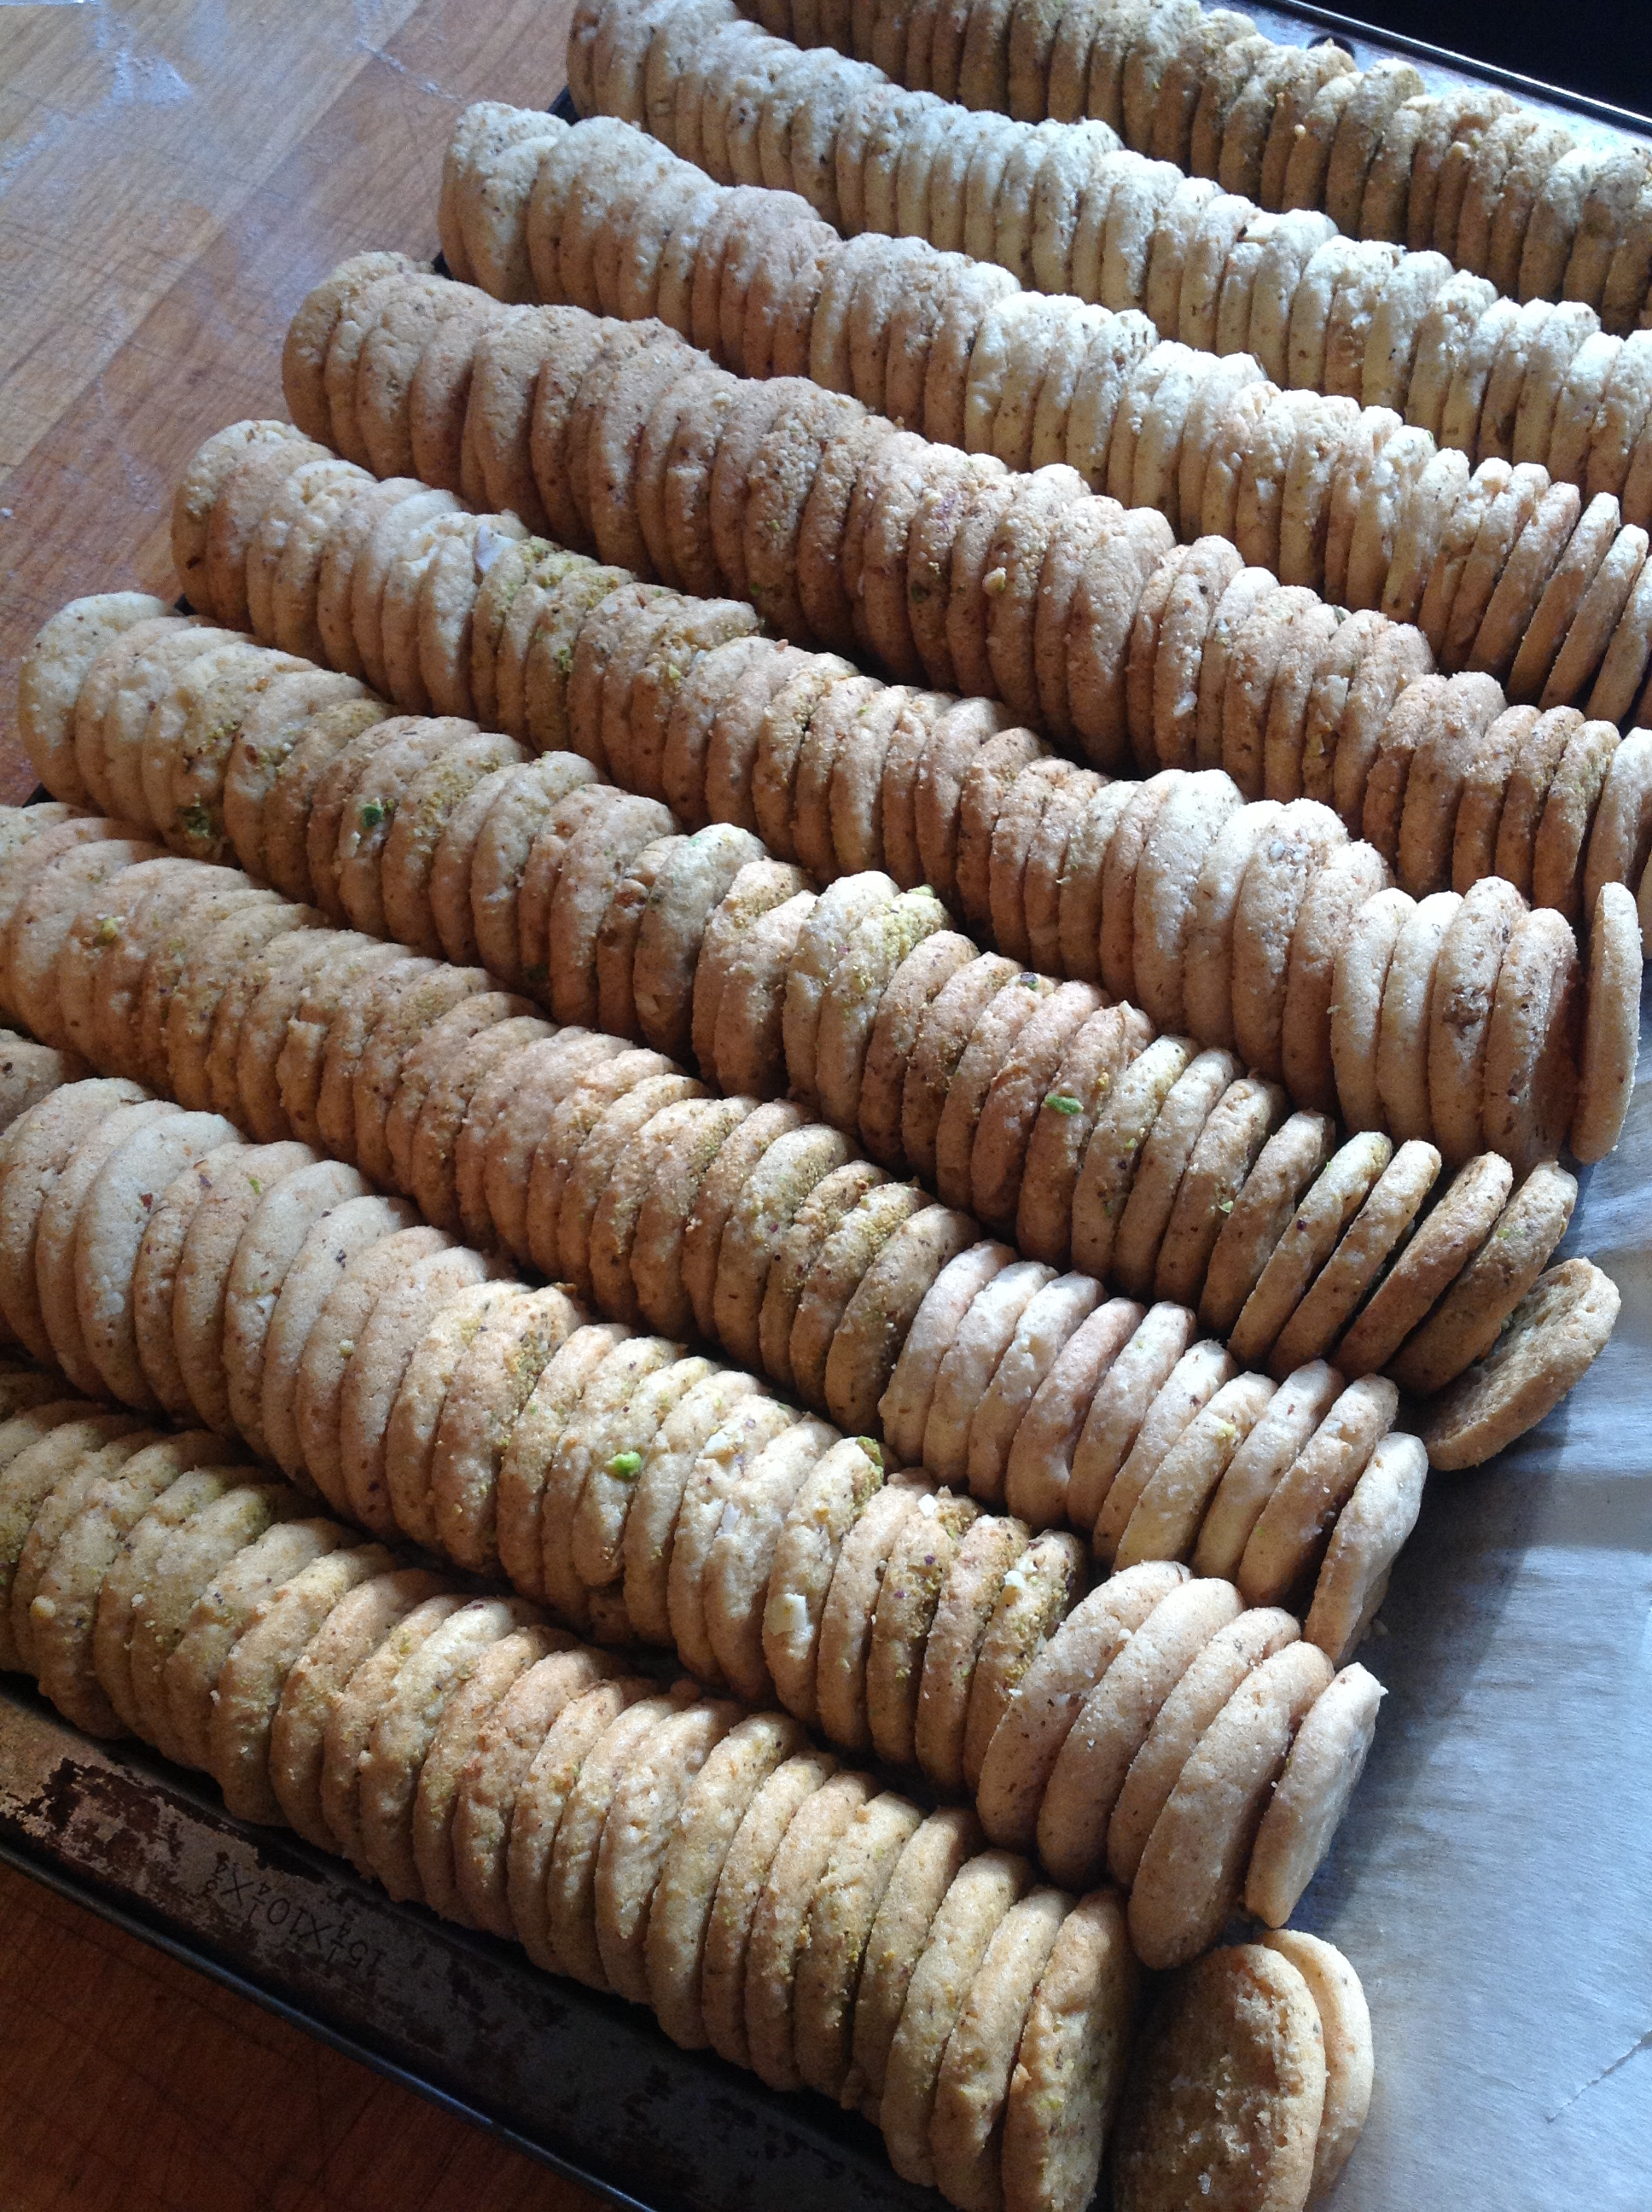
Biscotti gift bags, labeled, ribboned, ready to go

There are many affordable sweet pleasures to make at home, with a little time, a few pieces of equipment (or containers) and appealing packaging materials. As rewarding as making your own gifts is deeply gratifying, so can scaling back expectations (and budgets) in giving and receiving.

We’ve shifted our gift-giving to making a generous gift baskets for each family instead of gifts to individuals (except where children are on the list), with a focus on consumables, combining homemade with purchased locally made items.

In one weekend you can produce several items and have enough gifts for all the adults on your list. For me, working alongside a friend or family enhances the joy of the season, while speeding the process.  We laugh, talk, listen to carols. We can usually complete far more items together than I would be able to do on my own.

Gift Presentation

To be ready for early or mid-December gift making you need to get your packaging materials now.

Labels that can be printed off your home printer will not hold up as well (moisture will make the ink run) nor look as good as professionally printed labels.  Printed labels can be ordered online and arrive quickly. If you invest this year you’ll have plenty for years to come. Design one label to serve all purposes. Simply print your name in a homey, witty or elegant form, using an attractive font, leaving blank line/space to hand write whatever the item is (biscotti, soap, tea blends, cocktail cherries, Ginger Cider Syrup). For my first label I drew a bee logo but I didn’t plan for blank space, and because I was only thinking about my biscotti, the label isn’t as universal as it could be. For my second label I just used the name and bee in a small size, leaving room for anything I wanted to write. I chose round again so I could cover the top of the jam jars.

 Ordering custom labels raises your efforts to a more professional look. A custom order for 500 oval labels, 2” x 1”, with your own text will cost about $50 and will last, depending on how many gifts you give, for years to come.  Instead you can print your own or get a tie on tag.

Cellophane bags (available from many sources, AC Moore and Amazon among them) for baked goods and candies come in many size, flat and pleated.  Make certain you buy food safe bags. I use three sizes or pleated bags:  2 x 3, 9×4 and 11×5. The largest bag holds about ¾ of a pound of biscotti, snuggly packed.

Another useful packaging material is a large roll of cellophane. This the material that gift baskets are wrapped in – you cut to size, fold and tape or staple closed. Find these at a kitchen supply store to get the best value; Amazon also carries them. 100 ft. roll costs under $25 and will last you for many years.

If like me you live miles from ready sources, where you could spend a lot of time making calls and driving around to gather all the materials you need you’ll find Amazon can save you time, energy and gas. Search under Home and Kitchen for other options and materials for packaging for sweets or candy (decorative boxes, paper candy/cookie cups).

Readily available at most supermarkets, look for unbleached waxed paper to layer between cookies or candies, or as a wrapper for baked goods or caramel. Small brown paper sandwich bags can hold a sampling of your treats or two jams jars. Adhere one of your stickers to the brown bag with a couple colorful ribbons for an elegantly simple gift-wrapping.

If you don’t grow your own or have access to wild fruit (I pick all summer and freeze until jam season), you can buy frozen fruit to make jams, fresh fruit and vegetables to make chutneys. A box of 12 -8 oz. jelly jars costs about $12. Figure in the cost of your ingredients  (and  your time as well) plus the jar and label cost ($2 under per item) and you have an affordable artisanal gift.

 Some easy inexpensive homemade food ideas 

Before the Industrial Revolution and the rise of commercial advertising people gave fewer and smaller gifts, many were homemade, and most were useful.  Recipes for cider syrup and

 Pickled red onions

Marinated in seasoned white vinegar thinly sliced red onions are ideal accompaniment for sandwiches, pates and chopped liver. Use a low wide-mouthed jar. For a recipe see: http://www.foodandwine.com/recipes/pickled-red-onions-rae-and-noah-bernamoff

 Chutney

A simmered combination of fruit, onions, peppers and spices. A great alternative to sweet jams.

 Spiced or sweet nuts

Sweet and crunchy candied walnuts

Recipes for toasting nuts abound. Check out the websites for Martha Stewart, Epicurious and 101 Cookbooks for a few ideas. Buy the nuts in bulk to save. Use one single nut in a recipe or blend them for mixed bags. Twin gift bags make a delicious treat: one bag of sweet, and one of spicy or salty, each tied with its own colored cloth ribbon.

 Crackers

Crackers are easy and wildly versatile recipes let you be as creative as you want. Gluten-free and vegan, dense with herbs, seeds, nuts, or smoked salt, you can create your signature style. Pair with a wedge of local cheese and spiced nuts for a homemade gift basket.
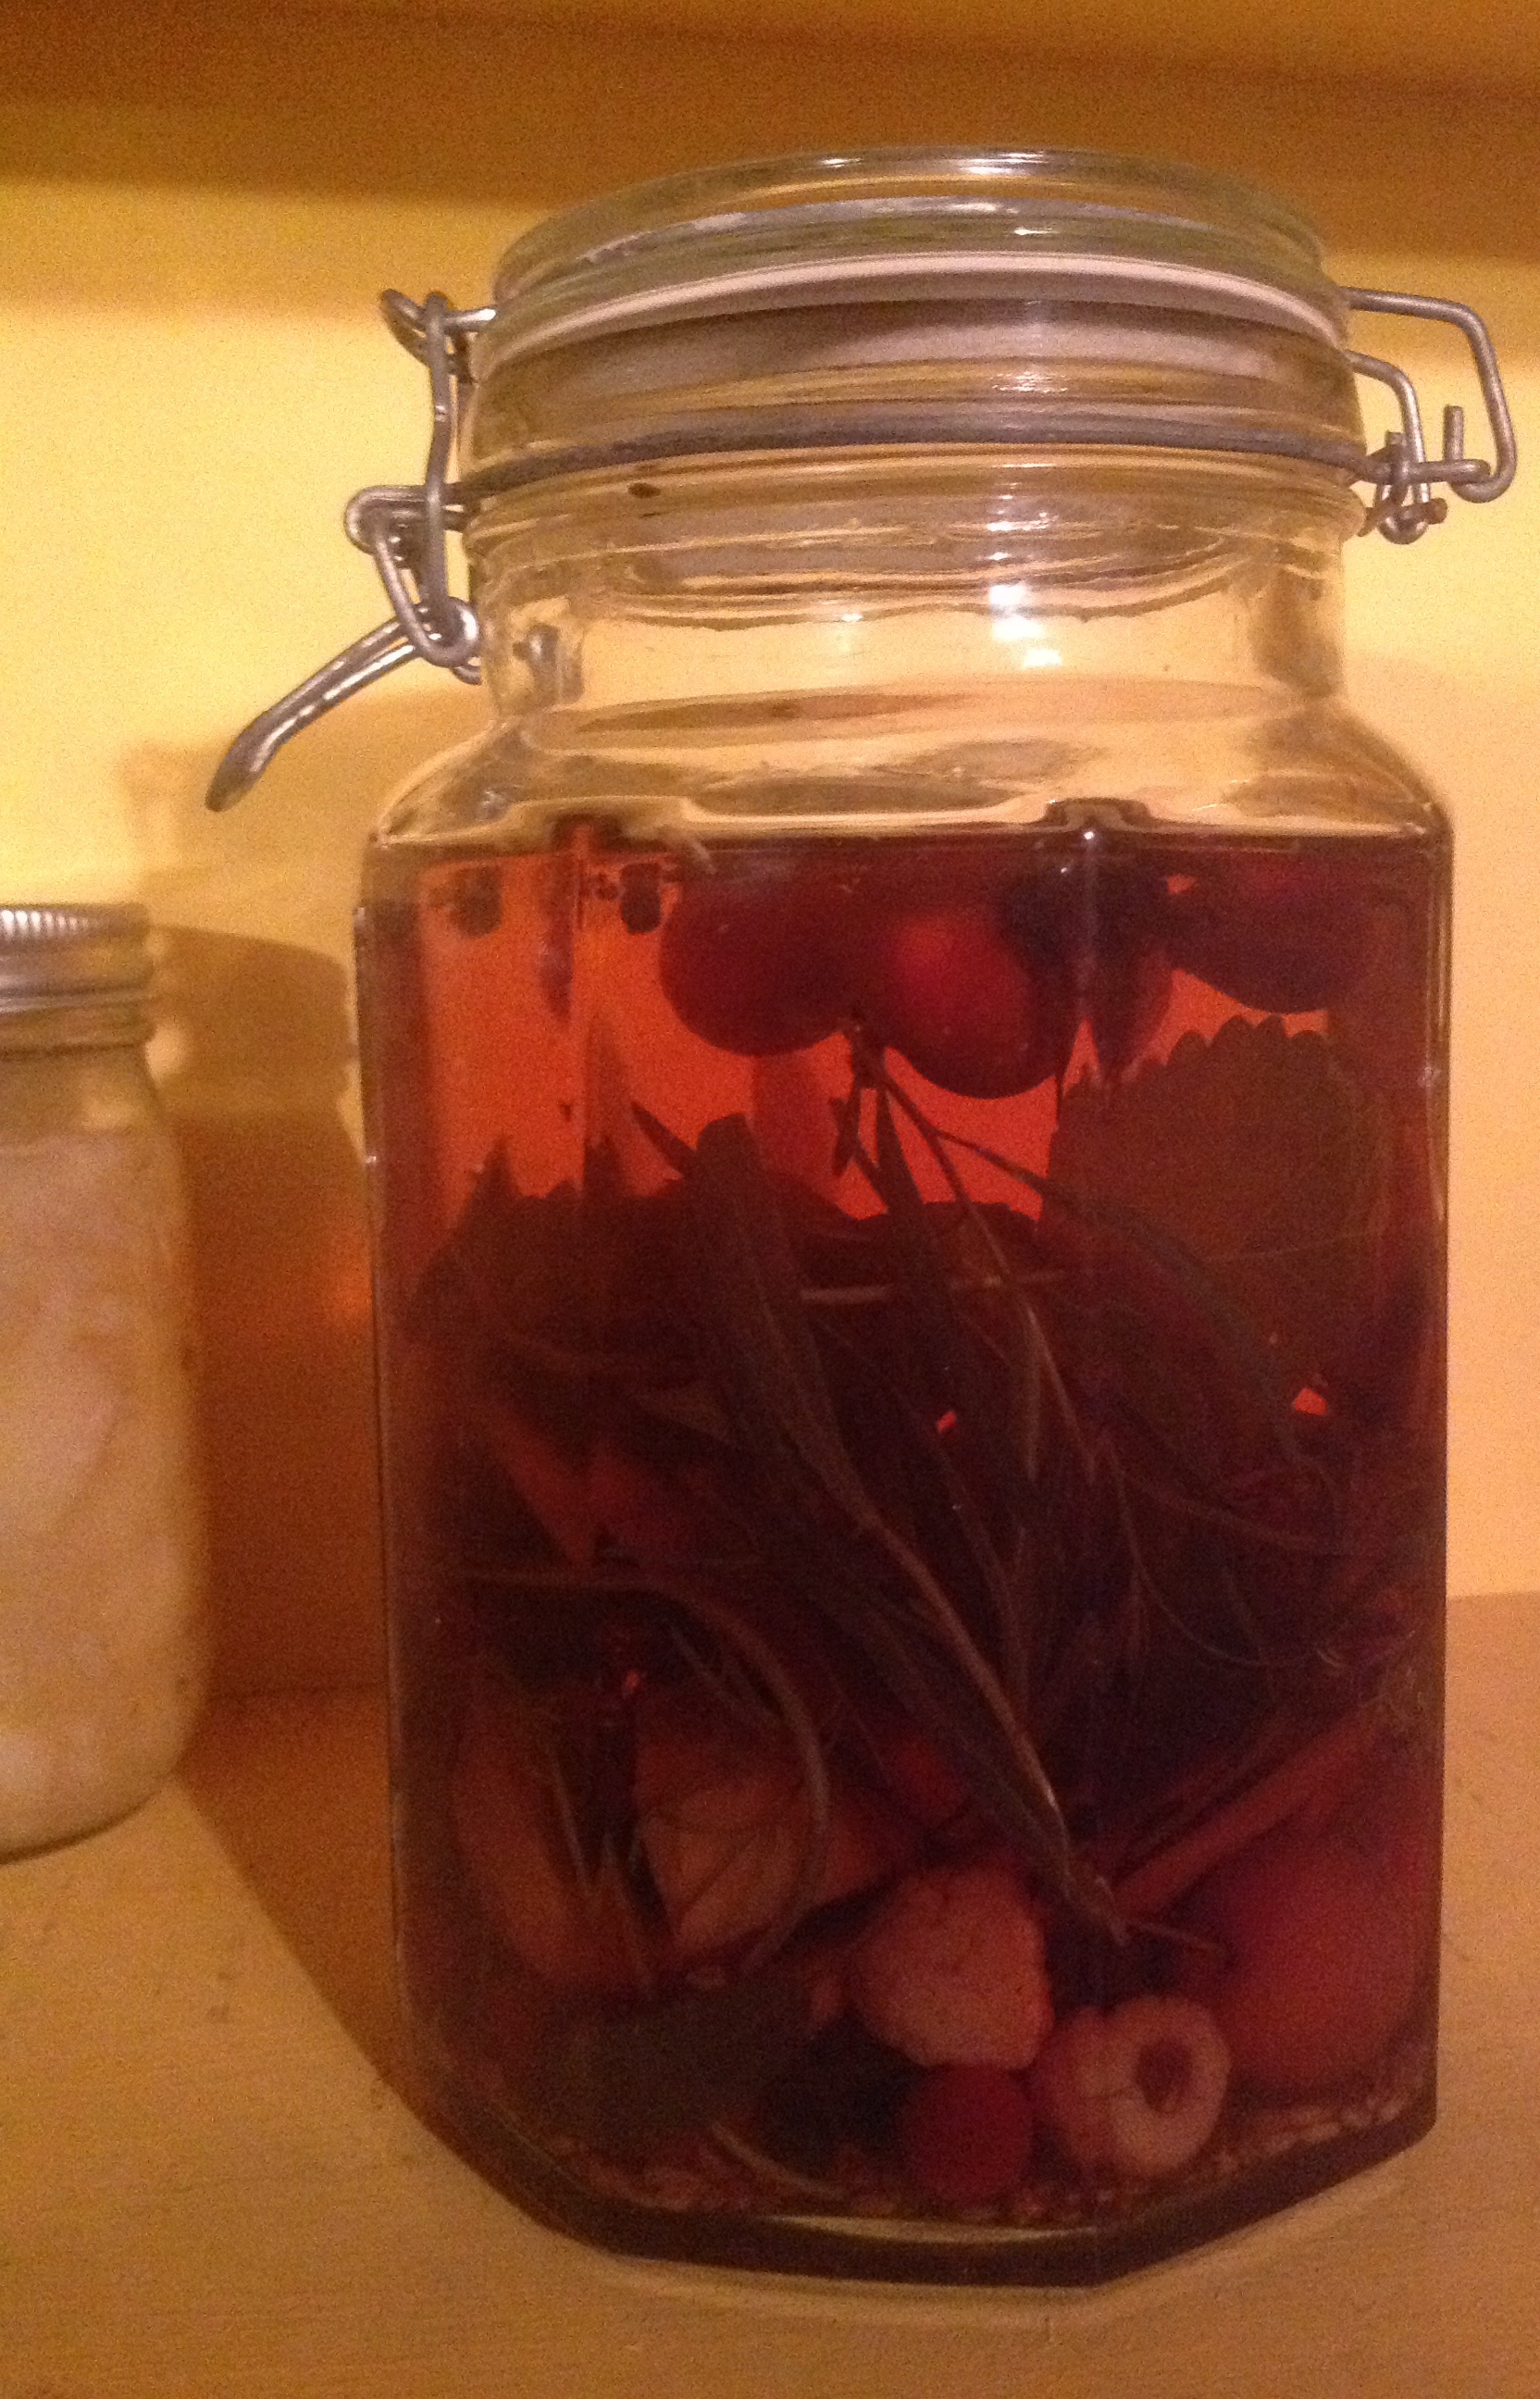
 For cocktail lovers

Make cider syrup, macerated cherries or drunken olives (recipes for the latter two will appear in an upcoming post.)

 Cider Syrup Recipe

Bright and tart, spicy with ginger, cider syrup is used as a sweet flavoring in cocktails, desserts, breakfast and as an element of a savory sauce. On gallon of cider will yield about 60 ounces = 10 – 6 ounce gifts. Depending on your area cider may cost $8 to $10 a gallon.

Ingredients:

Half gallon of fresh cider

1/4 c peeled fresh ginger in slices

6 oz. jelly jars or small decorative jars with screw top or corks

Other flavor options: add one clove, one whole allspice, one stick of cinnamon

Combine cider, ginger and any flavorings in a large saucepan. You can work with larger batches in a  large pot, but the reducing process will take longer. Bring to a boil over medium and cook until reduce by about half (the consistency of maple syrup is what you want for stirring into champagne, thicker is better if you want to add it to cream sauces); this will take about 2 hours on medium/low heat.  The result will be rich golden brown, as pourable as maple syrup. Cider syrup an be prepared without any flavorings as well. Strain to remove any solids and follow canning procedures.

Prepare containers for canning: wash jars or bottles with hot soapy water, heat in a large stockpot with enough water to cover jars by 2 – 3”. Fill while jars are still hot. Refrigerate for several weeks.

To serve:

Add 1 – 2 t syrup per glass of prosecco, garnish with orange zest

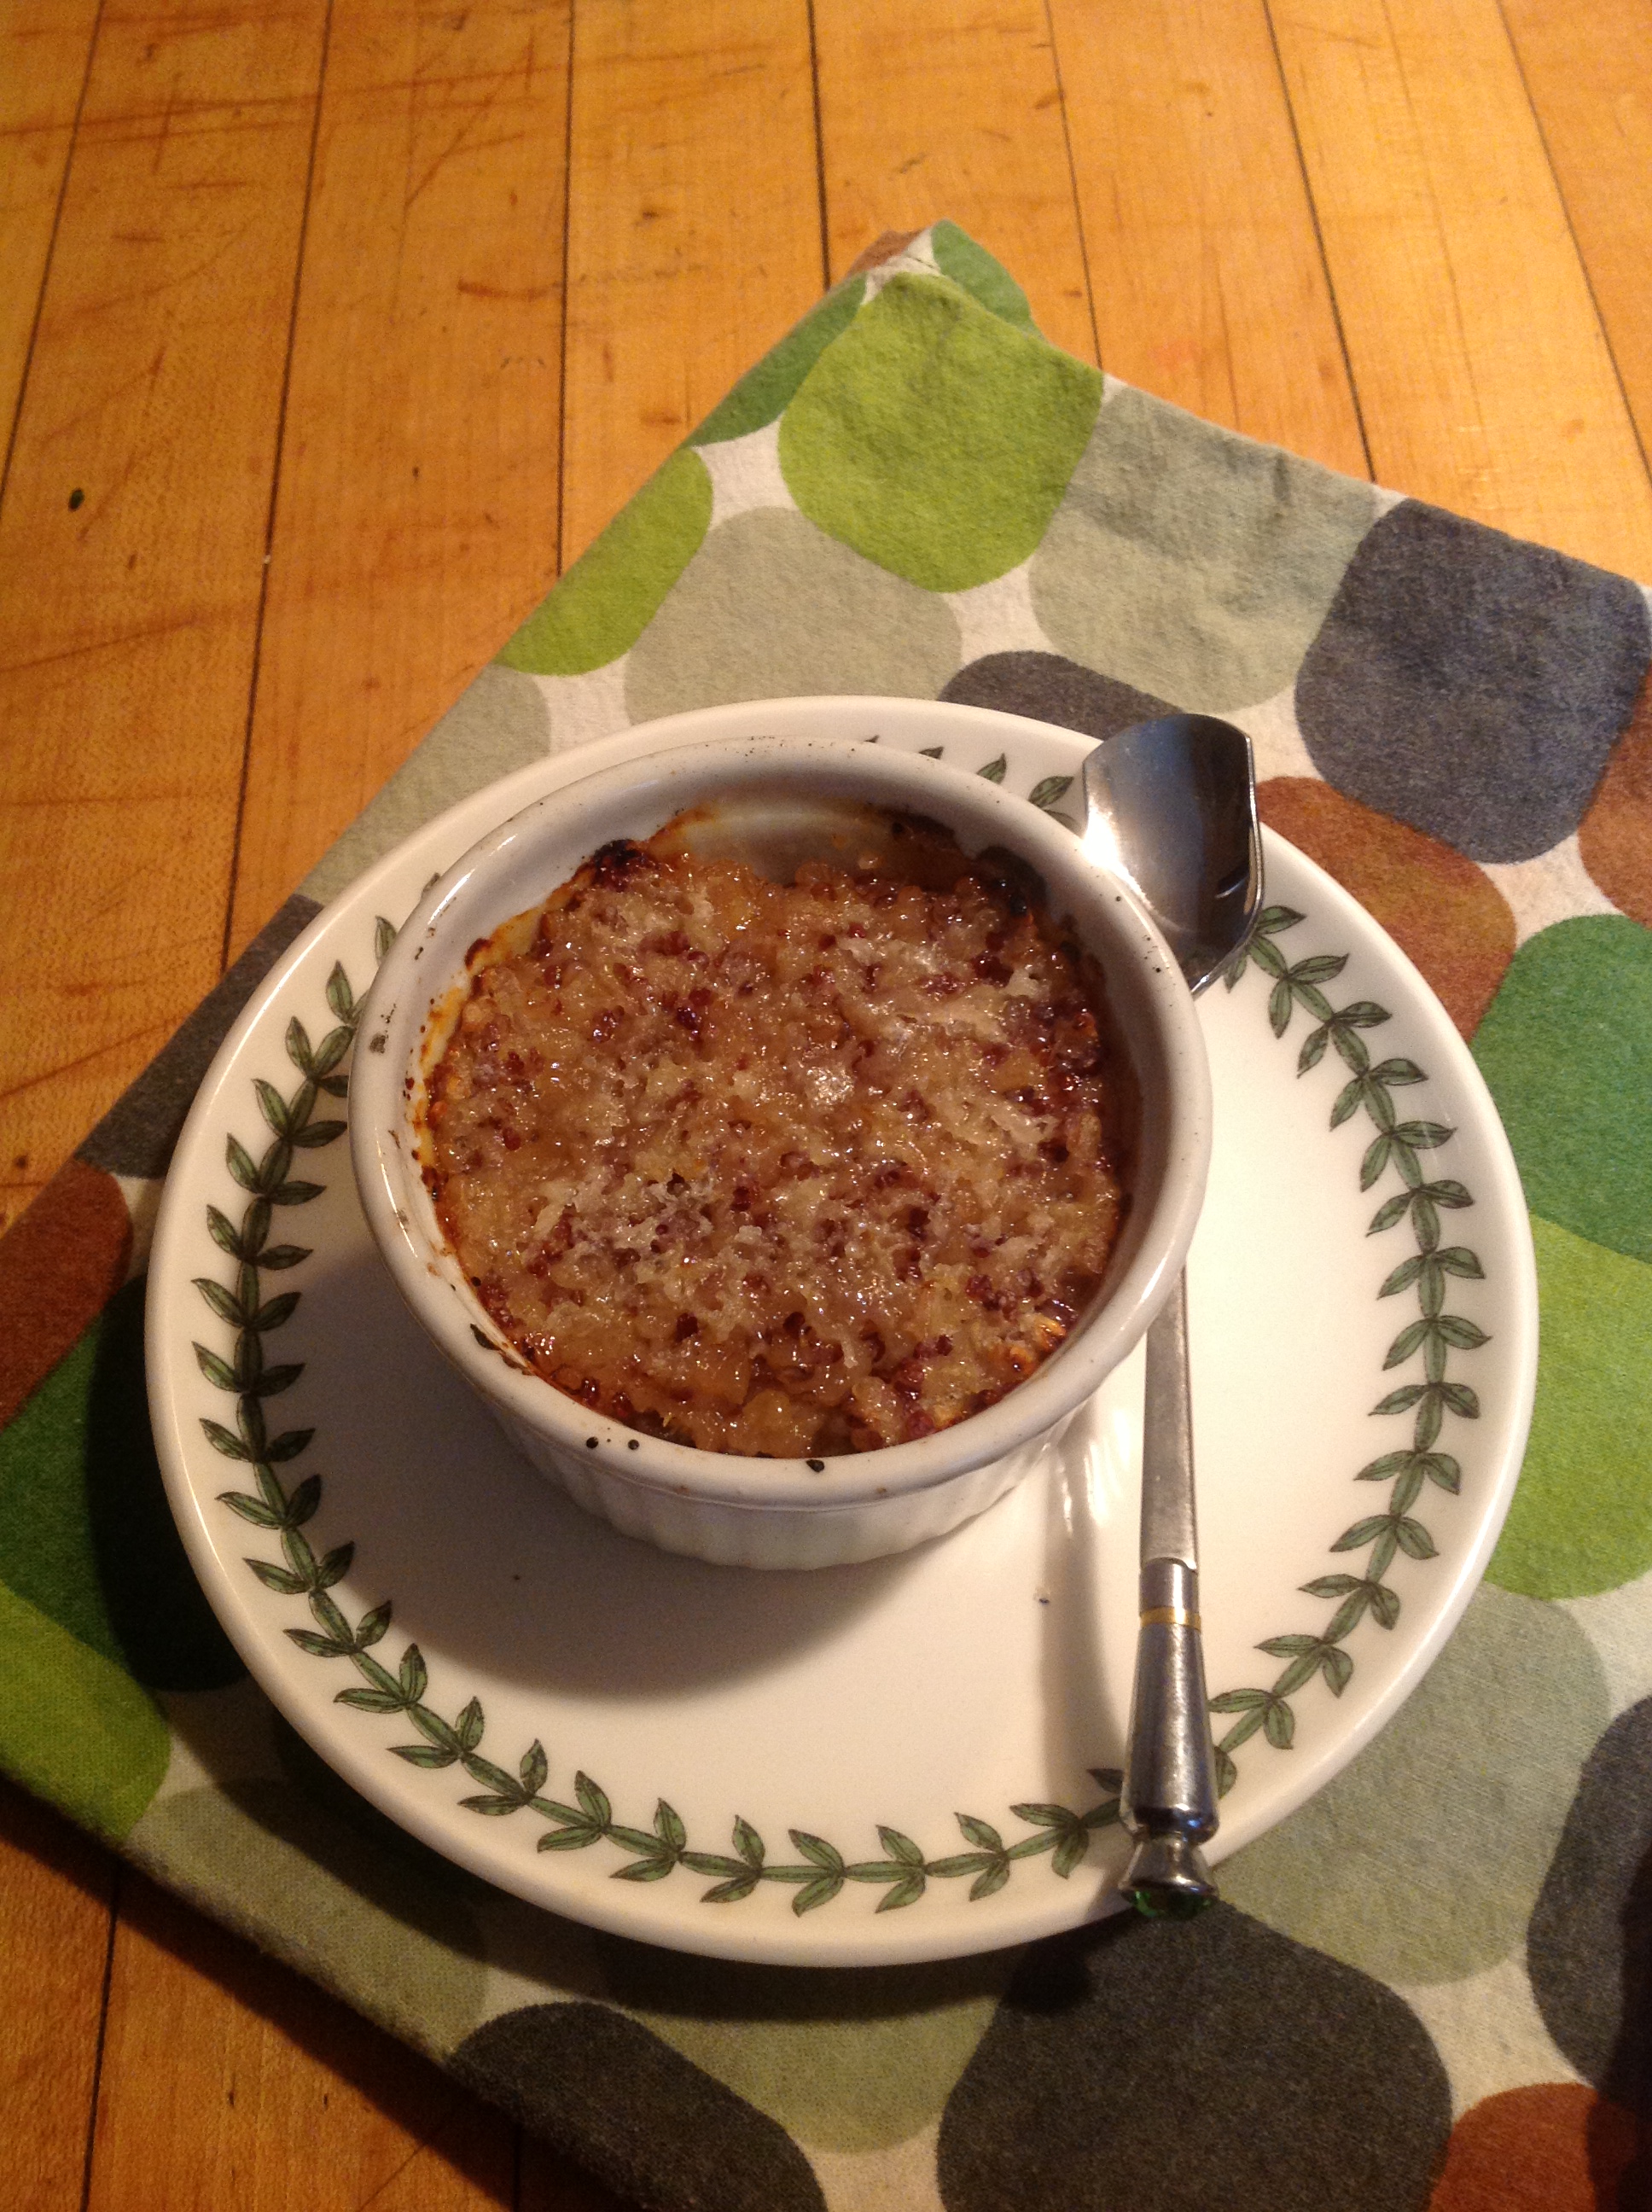
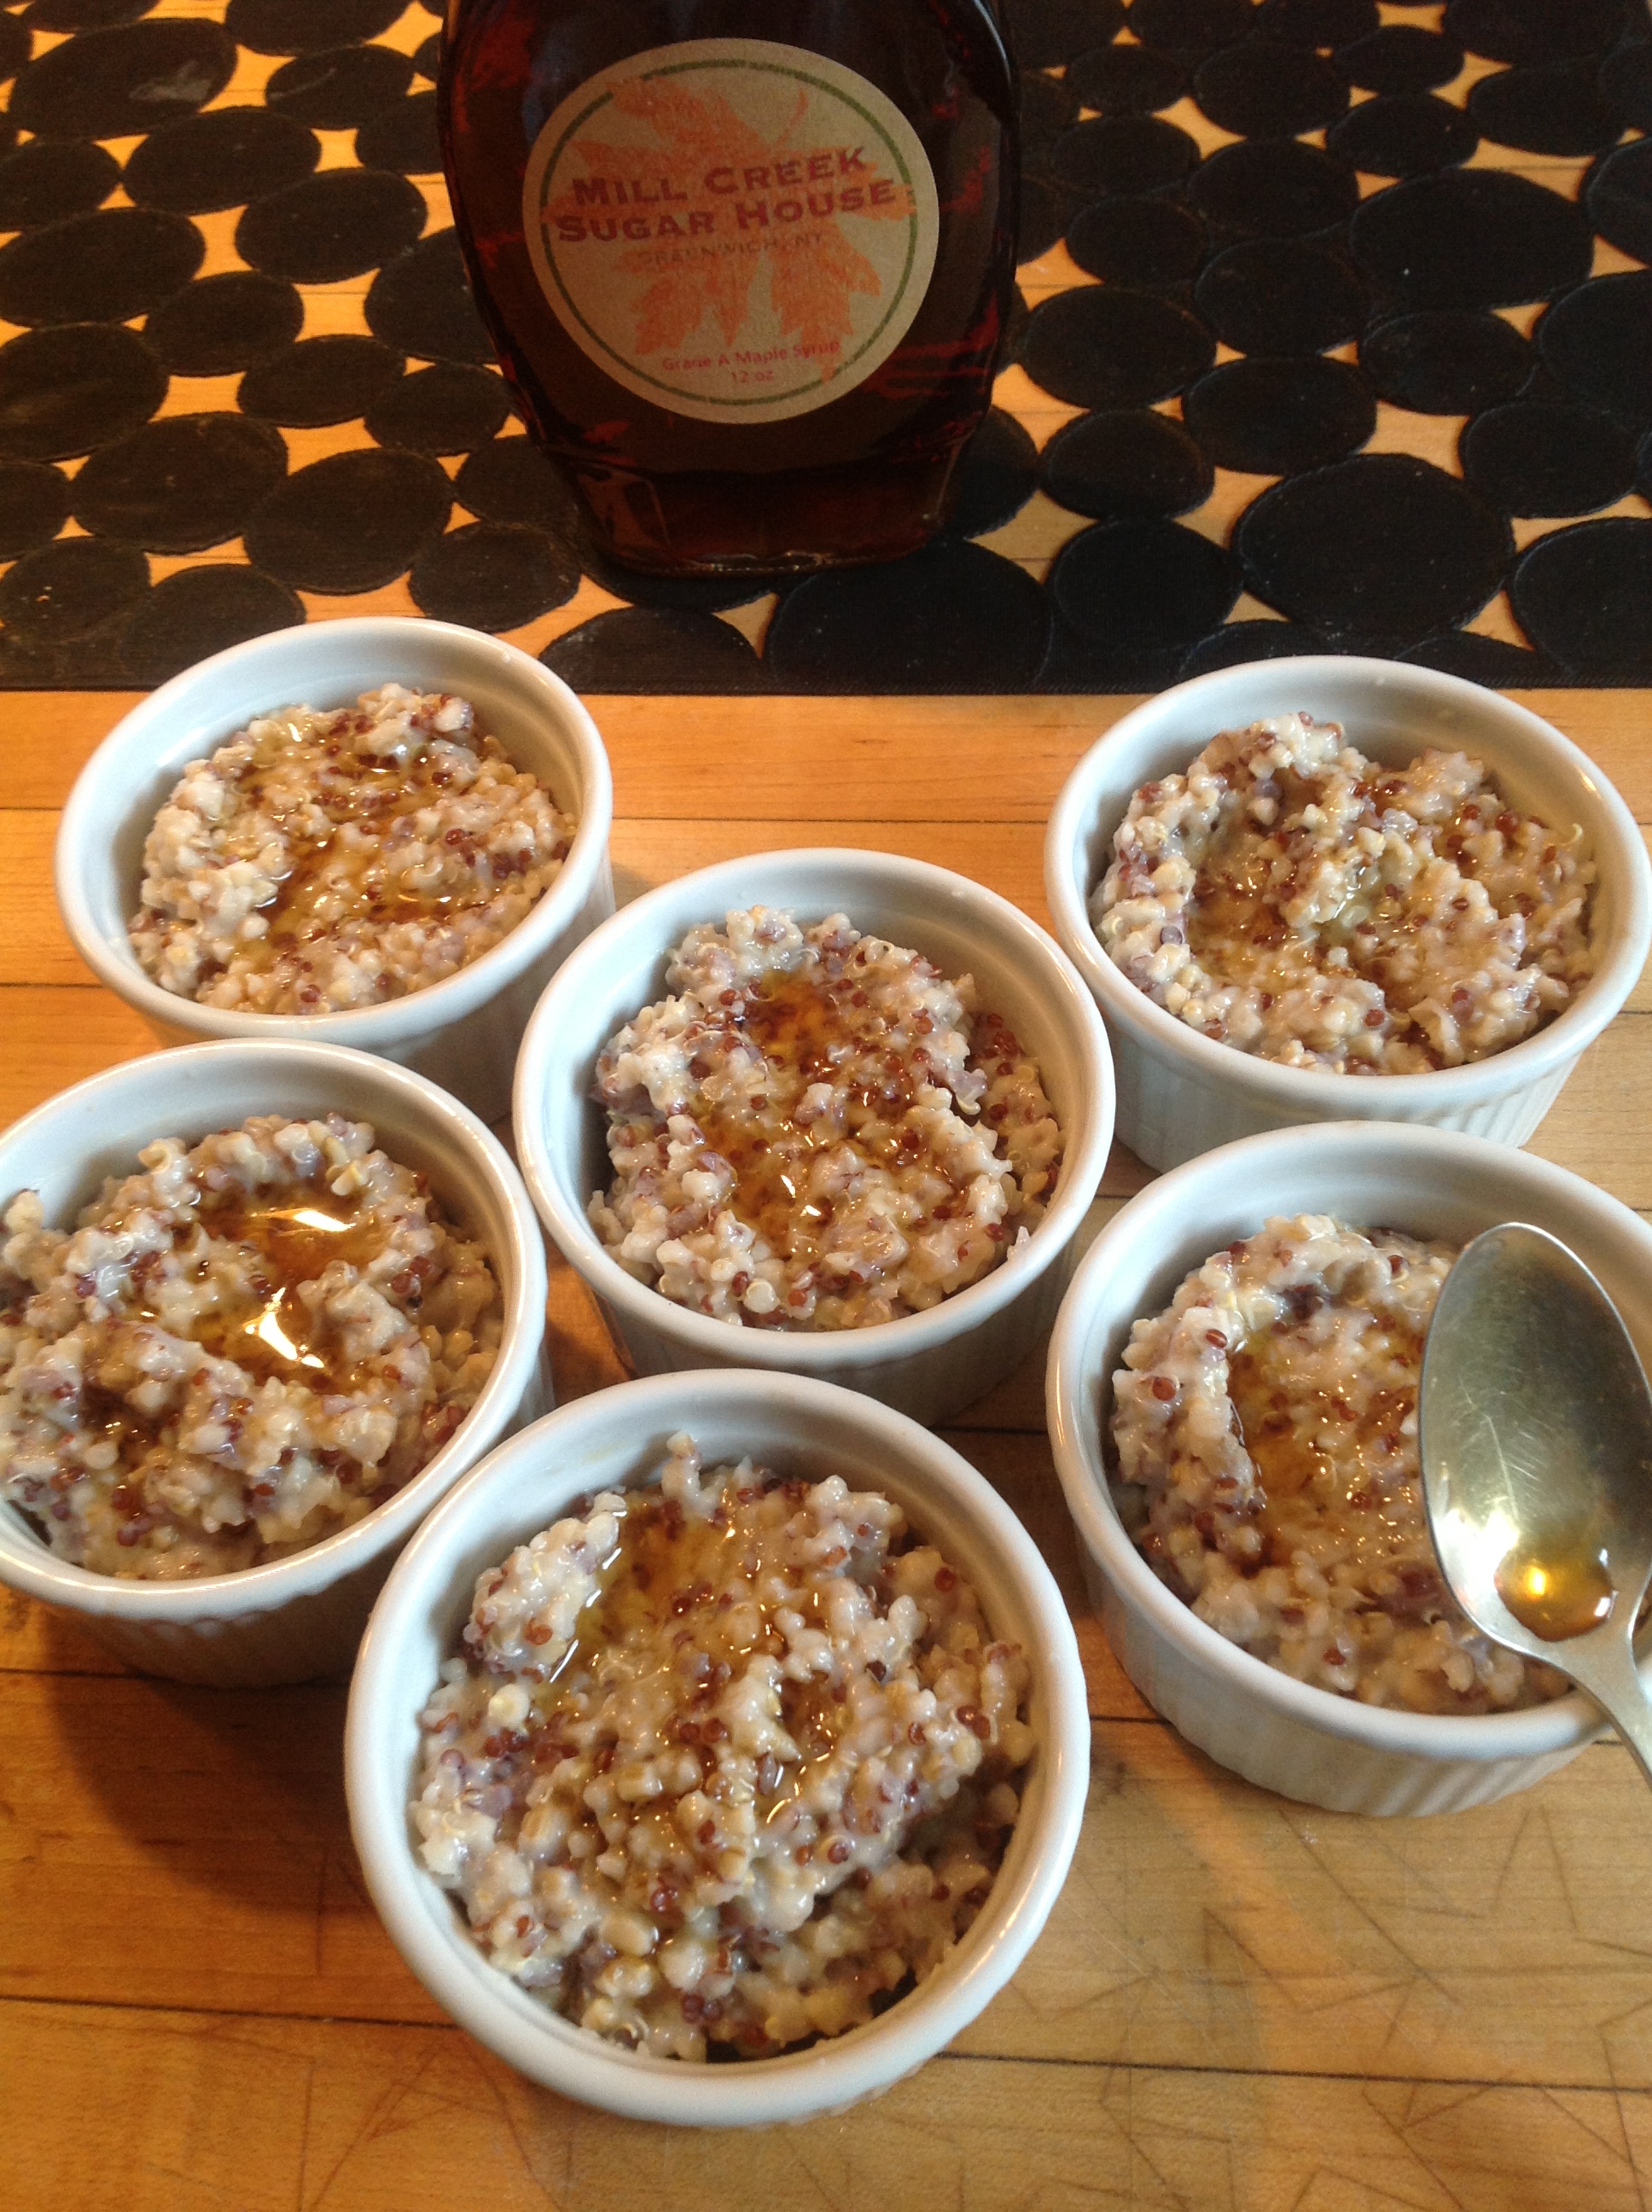
Drizzle over ice cream, yogurt, and hot cereals

Stir a teaspoon into hot tea or mulled wine

To make a cider rosemary cream sauce: reduce 2 to 4 T syrup further, until as thick as honey. Add 1 c of heavy cream (or more to taste), one sprig of fresh rosemary, heat to thicken and serve as a sauce for chicken, squash or pasta

Some sources:

Custom printed label  http://www.mavericklabel.com

Oval jars with cork closures, lidded candy dishes, hang tags, bakers twine http://www.save-on-crafts.com

Containers, candy and soap making supplies http://www.betterbee.com
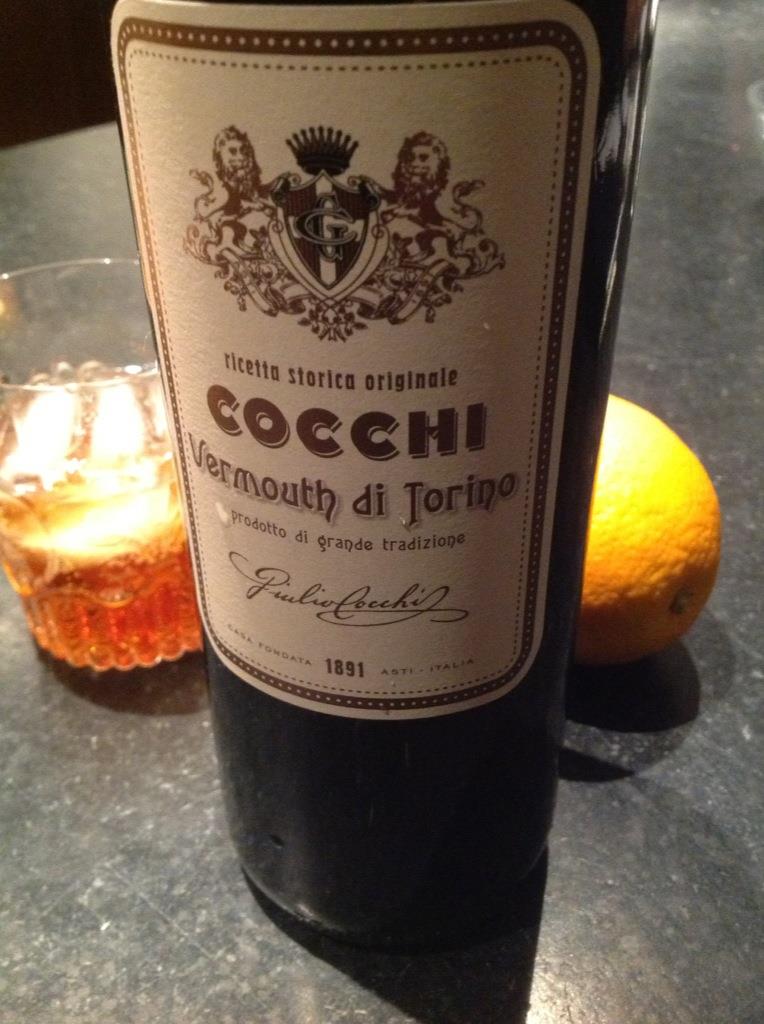
Posted in Entertaining, Jams and other canning, Sauces | Tagged , | 1 Comment

Salsa verde (guasacaca)

Salsa verde on the top shelf, pickles on the second and third shelves.

Green beans and cukes are done; kale, collards and chard are perfect right now. The new plantings of broccoli rabe and arugula are slowly coming up. With daylight hours on the wane, the remaining tomatoes are not ripening, and frost is an increasing risk. I picked a few to ripen in the house but most will go to waste, unless I pick them all now. It’s time to put away the benches, barrels and hoses, to mulch the garden beds ahead of the falling leaves. But first I have a harvest of about 15 pounds of green tomatoes to deal with.

What I had in mind as I started was guasacaca (wah-sah-kaka), the hand chopped Venezuelan salsa made with green tomatoes, avocado and vinegar instead of lemon or lime juice. Friends Liz Swan and Scott Britton gave me my first taste in a version that went with their pulled pork dinner for our Woods Hole vacation pig roast. Since I’m canning this batch I’ll reserve the avocado to add right before serving – but even without embellishment, you still have a good green sauce for chip dipping or nachos, or served with bbq or grilled meats.

In past years I’ve used late season unripe tomatoes in sweet jams, sometimes spicy with peppers, sometimes with lemon and ginger, but we never seem to eat enough of the jam. Yet all winter I buy jars of salsa for quick lunches of quesadillas or tortillas filled with melting cheeses, salsa, and whatever roasted vegetables or leftover meat we have from the last evenings’ meals. This winter instead of Newman’s red we’ll have our own salsa, spicy with a little heat, bright, tart and green: Salsa Verde.

Most salsa verde recipes call for tomatillos but I’m using what I have plenty of – unripend tomatoes.  Combined with a handful of neighbor Jim Kunstler’s abundant crop of habaneros and jalapenos (using the ripe red jalapenos for flashes of confetti) and my late planting of cilantro, I should have enough green salsa to see us through winter.

The recipe inspired by Liz and Scott is for a large batch, intended for canning.  Half or quarter this recipe to eat right away. Fresh salsa, without the cooking and canning, can be refrigerated without the addition of avocado, eat it within the week.  For the final prep: dice ripe avocados and mash into the salsa verde. Adjust seasonings. To hold the salsa until serving, place the avocado pit in the middle of the bowl of guasacaca to prevent browning. Remove pit before serving, and serve as soon as possible.

Yields 14 – 6 oz. jars. Do not double, as the batch gets too big to work with.

Salsa Verde

10 – 12 c green tomatoes, trimmed if needed, halved or quartered.

2 c sweet onions, peeled and quartered (alt: replace 1 c with chopped scallions, white and light green parts)

4 – 6 peppers (go for moderately hot jalapenos or Serranos, though I used one habanero and 5 jalapenos. Or use a mix of peppers for greater complexity.)

1 – 2c cilantro chopped

1 c flat parsley chopped (optional)

6- 8 cloves (freshest garlic you can find) chopped

½ c lemon juice (about 2 lemons)

½ c lime juice (about 3 lines)

1/2c white vinegar (5%)

2/3 c sugar

2t sea salt

approximately 4 avocados

 Steps:

With a heavy mortar or on a cutting board, smash and pound the garlic and salt into a paste.

Trim the peppers, removing the seeds and membrane.

You can prepare the salsa by hand for a more traditional chunkier version. Using a food processor – it may take 3 or more batches depending on the size of your processor bowl. If the tomatoes are large, cut them into quarters or 8ths. Process the garlic paste with the chopped onion, chilies and tomatoes, parsley and cilantro.  (I like to add parsley to cut some of the intensity of the garlic.) Process to a coarse consistency, to your liking.

(If you don’t intend to preserve your salsa by canning, you can now stir in the rest of the ingredients and set it aside to meld the flavors. Skip the remainder of the directions. Add avocado and enjoy!)

As you complete each batch, dump the processed salsa into a large stockpot. When you have all the tomatoes processed, stir to combine well. Add the sugar, juices and vinegar to the tomatoes and heat on medium until sugar dissolves, bring to a boil and then reduce to simmer for 20 minutes. Check flavor – spiciness will develop over time but it should have a bit of heat with the first taste. You may wish to add a little more salt, sugar or vinegar. As it cooks the color of the salsa will change from bright to a duller green.

** If this is your first attempt at canning please go to some expert sites to read up on the recipes, rules and risks: For more on canning check out the Ball jar website: http://www.homecanning.com/

And the National Center for Home Food Preservation: http://nchfp.uga.edu/how/can_home.html

Prepare jars: Jars should be washed then sterilized in a pot of boil water. Keep jars hot until ready to use. Lids should be kept heating in a small pot (not boiled). Fill jars, tapping the salsa down to remove air bubbles, leaving at least 1/2” at the top. When all the jars are filled you will have juice leftover – add a little juice to each jar to cover the surface of the salsa, but being sure to leave space at the top.  Wipe edges clean and dry, then cap each jar with a sterilized lid and seal with the screw on ring. Heat salsa jars in the hot water bath covered with a lid for 20 minutes. Remove to cool.

My pot holds 8 jars at a time so I process in two batches. Leave jars to cool on the counter. The jars are sealed when the button in the middle of the lid is depressed. If some jars don’t seal you can still use them  – refrigerate and enjoy within a couple weeks. Store in a cool dry place for up to a year.

To serve: add one 1 ripe avocado per 6 to 8 oz. jar.

Posted in Appetizers, Gardening, Process | Tagged , | 4 Comments

Summer into autumn

At Victory View Vineyard, La Crescent grapes cluster on the vines before picking, September.

Summer foraging is over, the pickles are made, tomatoes roasted and canned. Now all those berries I picked while it was too hot to cook have to go into pots for jam.

Late season ramps from early June, now curried pickles.

This year was my first for  pickling – starting with late season ramps in June. The greens die back but the bulbs are at their biggest, if you can find them.

The French cucumber seeds I ordered yield little cukes, perfect when picked small for classic cornichon pickles.

A handfull of cukes for cornichon

A few cucumbers always managed to evade my search, growing too large for pickling but great for salads.  I had only six plants survive to maturity, not enough to yield a jar a day. I did learn to wash them and wrap in a thick cotton towel in the fridge to keep them crisp enough until I had a full batch. Next year I’ll triple my plantings and make sure each of them has a protective ring around the base to the seedlings.

Peak tomato season - ready for roasting

In our garden it was a very good year for tomatoes. Loads went in the oven for roasting – very few of which were really sauce tomatoes. Roasting slicing tomatoes produces a lot of juice and dramatically little sauce. To roast, I tossed in fresh herbs, garlic, spicy peppers, set to 325 for an hour or until soft, then pureed them for freezing. All winter they will be a base for soups, sauces, or cook on the stove to reduce the juices and serve as is.

Though the blasting heat burned up all the wold black raspberries, summer offered up  a lot of magnificent harvesting days, days with friends, days in quiet communion with nature, and one big weekend out at Victory View Vineyard in Easton, helping them pick three of their wine varietal. The company, the easy rhythms of picking and conversations, great lunches and wine to take home – that weekend merits a much longer description. Plan to join the harvest next year and find out for yourself. They sent me home with grapes, two reds, Marshall Foch and Marquette, and one white, La Crescent for jellies. The juice smells sweet, intensely grape. The weekend’s cool rainy weather will be perfect for warming up the kitchen with  jams and jellies for canning.

Posted in Adventures in cooking, Gardening, Jams and other canning | Tagged , , | 7 Comments

Granola

Ok, you can’t see the granola for the berries in this shot, but it’s under there.  While berries are in season I can’t get enough of them so breakfast is equal portions of cereal and fruit.

As much as I love experimenting with new flavors, combinations, and techniques, I’m consistent to the point of boring about breakfast. In winter it’s steel cut oats with maple and pecans, in diners it’s scrambled eggs with cheddar and a side of crisp bacon. Now I have a summer staple: homemade almond granola with fresh berries. Plus a tall glass of cold brewed iced coffee.

At some point the recipe will change a bit: I may use only maple syrup and add ½ c pecans and tiny dried currants. Or switch from almond (or cashew) butter to a freshly ground peanut butter and add tiny chunks of good dark chocolate for granola that nearly stands in as a dessert and will chase off winter blues.

The basic recipe yields a satisfying granola that is easy to make, slightly sweet and filling. Since I started working on this recipe I happily eat it most mornings, topped with a half cup of fresh berries. Sadly strawberries season has ended, but this coincides with the ripening of wild black (or black-capped )raspberries, with some of the bright red raspberries are ripening as well.  Blueberries and wild blackberries are already starting, and if you can find local peaches – at this point I can talk myself out of the cereal altogether and just eat a bowl of fresh fruit.  However – the protein, insoluble fiber and a little fat in each meal ensures that I feel full and energized through the day. I won’t skip the balance in breakfast. Continue reading

Posted in Breakfast, Wild | Tagged , , , | 2 Comments

One pickle at a time

Because of the mild winter and untimely warm days before the equinox, ramps were up early in our region. Instead of the usual April 15 to early June; we started harvesting in early March. But my inner ramp calendar has me heading back to the woods in June.

Once the leaves die back (starting at about the 5th week of their growth cycle the leaves yellow and wilt, breaking down quickly) ramps are impossible to see until they sprout the long stem of their pending blossom.

But for the first week of June I was been digging in familiar spots, using last year’s dried seed heads as a sign, and then raking away the leafy mulch to dig out the fat white bulbs. The season for cooking ramps is past, now the fattest white bulbs are going into a curry pickle and the slenderest are brining for a future as cocktail onions.

I’ve been digging ramps for about a decade and I’ve stayed away from making pickles until now. I always thought that there were far more interesting things to do with ramps than soak them in vinegar. And though I love to extend the season, I did so by freezing, making pestos, white purees and butters to use through fall. But this year, having made sauerkraut and reading more about the fermenting craze (and the benefits of adding these  good bacteria to the diet)*, I decided to try pickling– classic dill, curry and cocktail style.

*As a follow-up to my earlier posting, Jennifer C educated me on the difference between vinegar pickling and lacto-fermentation. I can see in my future a bit of study on wild fermentation.

My first batch of curry-pickled ramps is just 3 weeks old and we’ve already dug in: served along side cheese for an appetizer at a dinner party, plated with a pastrami sandwich, and diced into curried turkey or potato salads. This batch has a delicate balance of bright curry, sweet and tart, without heat or overbearing garlic-ramp. With a delicate onion essence, and the firm crunch of a perfect pickle.

If you live further north of us (or at higher elevations) you may still be able to harvest ramps – bulbs only, before they begin send up their stems.

Curry Pickled Ramps

1.5 c rice vinegar
1 c filtered water
¼ c sugar
2 T kosher salt (use just 1 T if you only have table sale)
1 T curry powder
1 t whole cumin seeds
1 t whole black mustard seeds*
½ t turmeric
8 ounces whites only – roots removed and stem trimmed

*If you can’t find black mustard seeds you can substitute the whole yellow mustard seeds.

Combine the vinegar, water, sugar, salt, curry powder, cumin, mustard seeds and turmeric in a non-reactive saucepan, bring to a boil over high heat. Stir in the ramps and cook for exactly one minute.

Remove the pan from the heat and submerge it in a large bowl of cold water and ice until it has cooled down. Or use a strainer to scoop ramps out of the pot into a bowl set in ice to cool. You will want the mustard and cumin seeds but not the cloudy powder of the curry.

To filter out the powder: Line a strainer with a fine cloth or coffee filter to strain the liquid into a measuring cup. I scoop out most of the seeds, spooning them into the jars, trying to leave the powdery residue in the cheesecloth.

Place the ramps with seeds and brine in a jar, making certain the ramps are just covered by brine. If you find you run short on liquid you can top off the jar with a little more vinegar. Allow the ramps to pickle for at least one week before eating.

If you plan to seal the ramps in a canning process, follow the manufacturer or cooperative extension directions for sterilizing the jars and lids prior to filling them.

These pickles will stay crisp and improve in flavor over many weeks. We’ll continue to test them and report on how long they store.

You can double or triple this recipe.

Posted in Appetizers, Wild | Tagged , , | 1 Comment